V3R v1.4 — What's New
Release Notes · v1.4

Pearl paper, tone curves for every color and clear holographic foil.

Three substantial additions land together. Pearl arrives in V3R for the first time — a complete pearlescent substrate built around real face-to-flop physics, twelve named pearl stocks, and a pattern texture that captures the platelet character of pearl pigment. Clear Rainbow Holographic Foil ships as a new foil-colour mode and as a flood-layer option, with physically-additive blending that finally matches what diffraction film actually does to the light passing through it. And per-channel Tone Curves let you nudge cyan, magenta, yellow, black, white, and every spot ink to match a specific press's actual output — the difference between simulated and "ready to send to print." Alongside, a few rendering bugs that mattered have been quietly retired.

v1.4.0 · May 2026 · Khaos Technology Ltd

V3R v1.4 highlights — pearl, clear rainbow foil, and tone curves
Watch the highlights Visualis3R v1.4 — pearl, holography, and colour you can trust

Pearlescent substrate, arrives

Real pearl, not painted gradient
New substrate physics

Real face-to-flop colour shift

Pearl is the first reflective substrate V3R has ever shipped with proper angular physics. Real pearl pigment is built from microscopic platelets that reflect light at different wavelengths depending on the angle they catch it at, which is why a Champagne pearl looks creamy gold dead-on and warm bronze when the substrate tilts away from you. A flat painted gradient with a fixed rainbow tint can never capture that — the colour has to actually shift with viewing angle, the way real pigment does.

V3R now models that directly. Two colours drive the effect — the Face Color you see at perpendicular viewing, and the Flop Color the substrate shifts toward as the viewing angle increases — interpolated by a Fresnel-driven pearl shader with separate Intensity and Flop Sharpness controls so you can tune the strength and the sharpness of the angular transition independently. Each pattern flake within the pearl texture also picks up a small per-flake colour shift, so the pearl reads as a constellation of individually-catching platelets rather than a smooth painted surface.

The substrate's Paper Color picker stays separate from face/flop, which matters more than it sounds: vibrant pearls like Stardream Crimson or Curious Skin Pearl rely on a saturated paper base showing through the pigment layer. Fix the paper as white and you can never simulate them properly. Three layers of colour — paper, face pigment, flop pigment — give you the full range of real-world pearl stocks.

How: Substrate Controls → enable Pearlescent → adjust Paper Color, Face Color, Flop Color, Pearl Intensity, and Flop Sharpness.
New presets

Twelve named pearl presets, plus Custom

Pearl finishes from real paper merchants don't read as "adjust three sliders" — they read as named stocks the customer either knows or doesn't. V3R now ships with twelve presets covering the most-requested looks. Single-tone pearls — Crystal Pearl, Quartz Pearl, Ice Silver, Champagne, and Rose Pearl — for the classic understated stocks. Iridescent and aurora pearls — Mirage, Iridescent White-to-Pink, Iridescent White-to-Blue, Aurora Green-to-Gold, and Twilight Blue-to-Violet — for the genuinely flop-shifting jobs where the angular character is the whole point. Misty Rose and Antique Gold round out the set .

Pick a preset and face/flop/intensity/sharpness all snap to its calibrated values. Tweak any one of those four and the dropdown switches to Custom, so it's always honest about whether what you're seeing matches a named stock or is something you've personally dialled in. Custom states round-trip through Save as Default and named presets faithfully.

How: Substrate Controls → Pearlescent → preset dropdown above the Face/Flop pickers.
New pattern texture

A pearl-native pattern texture

Foil pattern textures — Stardust, Hammered, Brushed, and the rest — are designed to read as decorative effects sitting on top of a foil surface. Pearl pigment behaves differently. The texture isn't applied to the pearl, it is the pearl, and it needs to capture the soft platelet behaviour that gives pearl finishes their authentic catch.

Pearl Grain is the pattern texture built for this. Soft elongated platelets with anisotropic light catch, designed to read as classic pearl pigment under any face/flop combination. The pattern dropdown is substrate-aware: pick a foil substrate and you'll see the foil texture list; pick pearlescent and the list switches to the pearl-native option, so the controls always match the substrate they're decorating.

How: Pearl Texture Patterns → dropdown → choose Pearl Grain.
New shader parity

CMYK and spot inks render with pearl character

A pearl substrate isn't just a backdrop — ink printed on pearl stock inherits the substrate's angular character through the pigment film. V3R's per-layer shader now mirrors the substrate-level pearl behaviour, so CMYK process colour, spot inks, and effect layers all pick up the face/flop shift and per-flake colour modulation when they sit on a pearl base. The previous build rendered ink layers as if they were on plain paper regardless of substrate, breaking the visual continuity of the simulation.

How: Automatic. Any ink layer rendered over a pearlescent substrate inherits the pearl character.

Clear Rainbow Holographic Foil

Real diffraction, additive blending
New foil mode

Diffraction without the substrate tint

Rainbow Holographic foil ships with a saturated substrate colour by default — gold, silver, copper — and the rainbow shimmer sits on top of that. Clear Rainbow is the other side of the same coin: a foil that drops the substrate colour entirely and lets only the diffraction peaks render. The result reads exactly as it does on a real holographic film catalogue — colourless where the angle is flat, jumping into vivid spectral colour where the surface catches the light.

The blending mode matters here. Real diffraction is additive — light from the holographic peaks adds to whatever is beneath, it doesn't sit on top of it as a coloured film. Clear Rainbow Foil now uses native additive blending throughout the live render and the captured PNG, so the rainbow peaks layer correctly over substrate colour, ink coverage, and lamination beneath them. A vibrancy slider above 1.0 lets the diffraction over-saturate for an extra-vivid pop, useful when the customer's brief calls for the loudest possible holographic effect.

How: Foil layer panel → Foil colour dropdown → Clear Rainbow.
New flood layer option

An alternative flood layer

Clear Rainbow can also be added as a flood layer — the same diffraction physics applied across the full substrate, an alternative to Holographic Film for jobs where the customer wants a different visual character. Where Holographic Film reads as a smooth iridescent laminate, Clear Rainbow as a flood reads as something richer and more saturated, with deeper spectral peaks and a more pronounced colour shift as the substrate tilts. Same workflow as any flood layer — Full Coverage (Lamination) for an all-over film, or Ink Mask mode for film that only sticks where ink was printed.

How: Click the + Add Layer button → choose Clear Rainbow Foil → pick Application Mode.

Tone Curves

Match a specific press, channel by channel
New colour control

Per-channel tone curves for every ink

V3R's factory inks are tuned against the Fogra 51 reference profile — accurate as a starting point, but every press in the field has its own colour signature. A Ricoh Pro C7500 sitting in one shop renders cyan slightly different from another C7500 across town, and both differ from a Xerox Iridesse on the next bench over. To make V3R's simulation match what a specific press actually produces, you need a way to nudge each channel independently — lift the midtone of magenta a touch, ease back yellow at the top end, drop black's shadow density a half a per cent.

Tone Curves do exactly that. Every ink channel — process CMYK, white, and every spot colour in the press configuration — carries its own dot-gain curve, edited through a familiar drag-the-anchor-points interface. Adjustments apply in real time to the live render and to captured PNGs, and curves are stored against the active press configuration, so they travel with the press rather than being attached to a single job.

The factory state is identity (no change) on every channel, so the simulation looks identical to previous releases until you actually edit a curve. When you do, V3R remembers — load a job tomorrow for the same press and the curves are still in place, doing their quiet job in the background.

How: Per-layer panel → Edit Tone Curve... button beneath the colour controls.

The UI grows up

A quiet design system
Panel grouping

Cyan accent stripes for grouped controls

Substrate Controls and per-layer foil panels both carry collapsible subsections — Foil Texture Patterns, Pearl Texture Patterns, 3D Raised Foil — which previously sat as ungrouped headers in the panel and tended to disappear into the surrounding sliders when expanded. Each of those subsections now carries a 2px cyan accent stripe down the left edge with a slightly tinted background and inset padding, reading clearly as a self-contained group of related controls rather than blending into the parent panel. The treatment is subtle on purpose — explicit enough to find at a glance, quiet enough not to compete with the actual content.

Rainbow controls — Frequency, Pattern Complexity, Vibrancy, Coverage Variation — get the same stripe when they appear, both on the Rainbow Holographic Foil substrate and on any per-layer foil set to Rainbow. Four sliders that only make sense together now visibly belong together.

How: Automatic. Look for the cyan accent stripe wherever a subsection groups related controls.
Active-state indicator

At-a-glance active dots

A small cyan dot now sits beside the header label of each accented subsection whenever something inside is in active use. Pick a pattern in Foil Texture Patterns and the dot lights up. Set 3D Raised Foil's Raised Height above zero and that dot lights up too. Set either back to default and the dot disappears.

The dot is most useful when the section is collapsed. You can scan a foil layer's panel from top to bottom and immediately see which subsections are doing something without having to expand each one. The indicator also stays correct through Reset to Default and Factory Reset, so you always see the truth of the current state.

How: Automatic. Watch for the small cyan dot beside section headers.
Naming clarity

Surface Texture vs. Pattern

Foil layers have two genuinely different texture controls that were both labelled "Texture Strength" — a long-standing source of confusion. One drives the substrate's microscale surface character (matt-to-satin-to-glossy roughness), the other drives the amplitude of a decorative pattern picked from a dropdown (Stardust, Hammered, Pearl Grain, etc.). Both could be visible at the same time, with the same name, doing very different things.

That's now cleaned up. The always-visible surface character slider is now labelled Surface Texture, and the pattern section's three controls are Pattern Strength, Pattern Scale, and Pattern Direction. The section header itself is now Foil Texture Patterns (or Pearl Texture Patterns) — explicit about being a collection of patterns rather than a single texture. The vocabulary is now self-explanatory: surface character lives at the top level, pattern parameters live inside the patterns section.

How: Automatic. Look for Surface Texture outside the Patterns section, Pattern Strength / Scale / Direction inside it.

Fixes & polish

8 improvements
Holographic film

Pillars of Light shift as a rigid group, no longer warp around a sphere

The Pillars of Light pattern's bands used to warp around an imaginary sphere as the Pillar Movement slider increased — even at low values, individual bands had an internal sway that betrayed the trick. The fix was a single change to how the shader computes the camera-to-surface direction: where the previous build did it per-pixel (which gave each fragment its own slightly different tilt and produced the fisheye effect), the new build computes it once per mesh from the plane's centre. The bands now slide as a rigid group across a flat surface, the way real holographic diffraction bands actually behave.

Silver metallic

Silver gradients now fade smoothly all the way to invisible

Silver gradient backgrounds had a hard edge around the 5% coverage mark — the gradient faded smoothly down to a point, then snapped to fully transparent, revealing the substrate cliffside-style. The cause was a hard discard threshold in the metallic shader branch using the layer's alphaTest value (0.05) as a "is this pixel real?" check, which is fine for flat spot logos but cliffs any gradient that crosses 5%. The metallic branch now uses the same near-zero threshold as the CMYK branches, so the discard only fires on truly empty pixels and the gradient falls off smoothly to invisible at the edge.

Image capture

Clear Rainbow Foil captures match the live render exactly

Image capture used to do a temporary blending-mode swap on varnish-like layers and then restore the original. A keyword-match for the word "clear" was inadvertently routing Clear Rainbow Foil through the varnish path, which switched its blending to additive during capture and never restored it — leaving the live render jerky and the captured PNG looking different from what was on screen. Clear Rainbow now stays on its own additive blending path throughout, so what you capture is what you see.

Pearlescent

Pearl saved defaults and named presets now restore correctly

An internal naming inconsistency between the substrate save chain and the older preset application path was causing pearlescent substrate state to fall through to plain paper rendering whenever a pearl preset was loaded or a saved default was reset. Save as Default, Reset to Default, Factory Reset, and named base presets now all round-trip pearl state — face/flop colours, intensity, sharpness, preset name, and pattern texture — faithfully.

Pearlescent

First-time pearl activation shows textured pearl, not flat

Activating the pearlescent substrate for the first time used to drop the pattern texture dropdown to None, leaving you looking at flat painted pearl until you found the textures section and picked Pearl Grain manually. The substrate now reads its full factory state — including pattern type, strength, and scale — on first activation, so what you see immediately is what pearl is actually meant to look like.

Foil layer

Reset and Factory Reset now refresh active-state dots

Pressing Reset to Default or Factory Reset on a foil layer applies the new settings, but the panel's active-state dots — the cyan indicators next to Foil Texture Patterns and 3D Raised Foil — used to retain their previous state and didn't reflect the post-reset reality until the user touched a slider. Both buttons now refresh the dots immediately, so the panel always tells the truth.

Substrate panel

Texture pattern section closed by default for all substrates

Pearl substrate previously force-opened the pattern section on activation, which was good for pearl users (where a texture is on by default) but confusing for foil and rainbow substrates (where None is the default and an open section showed irrelevant sliders). The section now defaults closed for every substrate, with the active-state dot on the section header making clear at a glance whether anything is in use.

Layout polish

Face and Flop pickers paired on a single row

Face Color and Flop Color are conceptually two sides of the same control — the start and end of pearl's angular shift — but they previously occupied two full rows in the panel with most of each row empty. They now sit side-by-side on a single row at 50% width each, reclaiming vertical space and visually pairing the two halves of the colour-shift effect.

Previous Release v1.3 — The physics of finishing, refined May 2026

The biggest substrate-physics release V3R had shipped. New Ink Matte Control simulating how translucent inks dull every reflective substrate, press-pass density sliders for every neon and ECG ink, a complete matte lamination physics rebuild, spot-UV burn-back, multi-page companion files, and a critical GPU compatibility fix for Mac users hitting a black-page bug with Sculptured Varnish.

Substrate physics & ink interaction

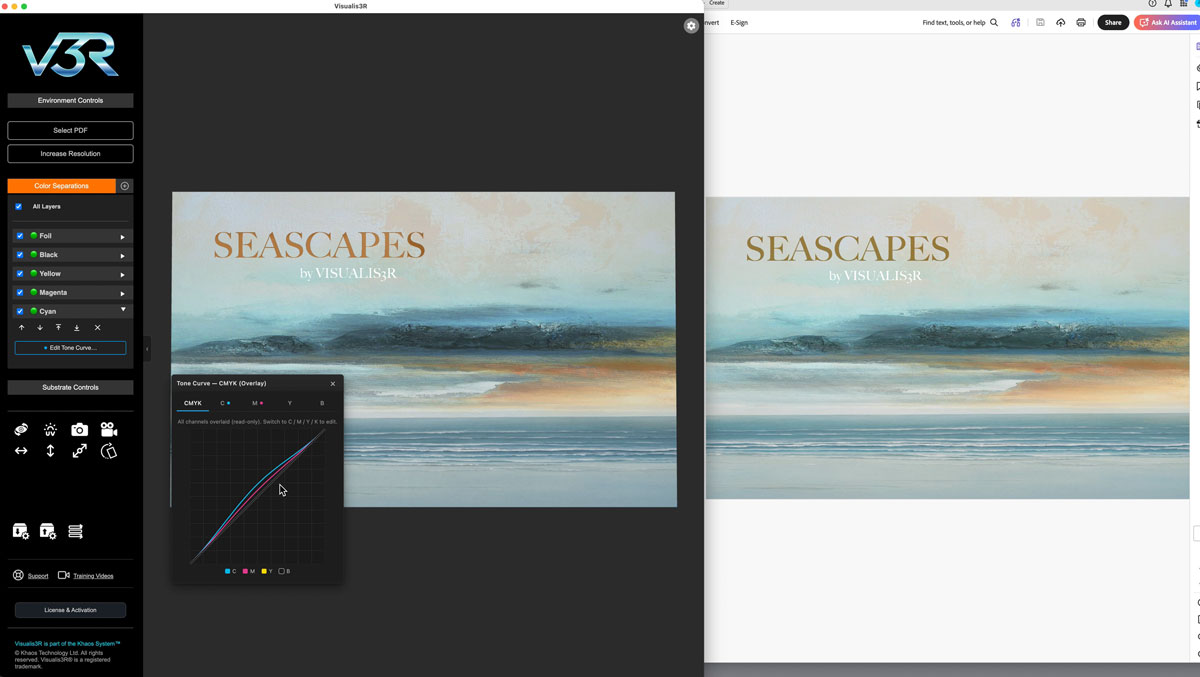
Inks & surfaces, talking properly
New substrate physics

Ink Matte Control on every reflective surface

Print an ink film over a reflective surface and the reflection beneath gets dulled — the ink scatters incoming light before it reaches the substrate and again on the way back to the eye. V3R now models this directly across every substrate type that has any specular character: foil, rainbow holographic, brushed metal, glitter, plastic, clear film, and pearlescent papers.

The physics is split correctly between ink types. Translucent inks — CMYK, fluorescent neons, ECG, generic spots, and ColorLogic CMYK — dull the substrate in proportion to ink coverage scaled by opacity. Opaque-at-100% inks — white, metallic, ColorLogic Silver/White/Custom Metallic — only contribute when their opacity is reduced.

A single Ink Matte Control slider sits in the Substrate Controls panel whenever a substrate with specular character is active. Each substrate type remembers its own value via the existing Save as Default / Reset to Default / Factory Reset buttons.

How: Substrate Controls → enable any reflective substrate → adjust the Ink Matte Control slider that appears.
New ink control

Press-pass opacity for neon & ECG inks

Fluorescent and ECG inks now carry their own opacity slider, the same as metallics and white. The default of 100% reflects the recommended single-pass density values supplied by press manufacturers. Below 100% simulates a thinner ink film, useful for previewing single-pass vs two-pass jobs.

Opacity also feeds into the new Ink Matte Control: less ink film on a reflective substrate dulls the reflection less.

How: Per-layer panel for any neon or ECG ink → Opacity slider beneath the colour picker.

Lamination & burn-back

A new chapter for matte
New finishing physics

Matte lamination, properly behaved

Matte lamination has been rebuilt from the surface up. The old over-eager environmental haze that lifted blacks toward grey is gone, replaced by a more honest dimming of sharp reflections that leaves dark areas dark.

Three controls now do what they say: Matte ↔ Gloss moves between satin and full gloss, Matte Texture adds the micro-roughness of textured matte film, Matte Veil is the optional desaturating veil for the heaviest matte stocks. Tooltips on every slider, factory default of full gloss.

How: Substrate Controls → Lamination → adjust the three named sliders.
New finishing effect

Spot-UV burn-back

Real spot UV applied over a matte-laminated surface locally re-glosses the area beneath — the varnish "burns back" the matte film and reveals a sharp, mirrored finish exactly where the spot is printed. V3R now simulates this faithfully with clean falloff at the edges.

Each varnish layer carries its own Override matte (burn back) toggle, on by default. Turn it off for varnishes that should sit on top without burning through.

How: Per-varnish-layer panel → Override matte (burn back) checkbox.

Workflow improvements

3 quality-of-life additions
Mapping manager

Dedicated foil colours in the mapping dropdown

The Layer Mapping Manager now offers eight dedicated foil presets directly — Silver Foil, Gold Foil, Red Foil, Green Foil, Blue Foil, Pink Foil, Purple Foil, Bronze Foil — alongside the existing Holographic option. Pick the colour you want and the layer arrives in the sidebar already named and configured.

How: Layer Mapping Manager → effect dropdown → select any of the named foil colours.
Add Layer

Pick a page from a multi-page companion file

Versioned and variable Duplo or sleeking files often arrive as a single multi-page PDF. Add Layer now opens a thumbnail picker showing every page of the companion file with grayscale preview, separation count, and clear selection state. Single-page PDFs skip the picker entirely.

How: + Add Layer → choose a multi-page PDF → pick a page from the grid.
Mapping manager

Empty channels default to Ignore

The mapping manager now samples each separation as it loads, and any plate with under 0.05% ink coverage is flagged with a grey ⊘ Empty badge and pre-set to Ignore. The dropdown stays editable for unusual cases.

How: Automatic on every Layer Mapping Manager open.

Fixes & polish

8 improvements
Substrate ink-matte

Toggling ink layers off no longer leaves ghost matte on the foil

The ink-layer checkbox handler is now centralised through the same path that drives the holographic-film coverage mask and varnish refresh, so every visibility change rebuilds the foil ink-matte mask cleanly.

Neon & ECG opacity

Opacity slider now visibly fades the ink, not just its alpha

The neon/ECG/CMYK ink shader uses multiply blending, where alpha-channel opacity has no visible effect. Opacity is now applied as a mix toward white in the colour pipeline, so the slider correctly fades each ink under multiply blending.

GPU compatibility

Sculptured Varnish no longer renders pages black on certain Macs

A driver-level edge case caused entire pages to render solid black on some Mac GPU configurations whenever Sculptured 3D Varnish was enabled. The shadow pass now contributes a guaranteed no-op outside the varnish region, eliminating per-driver dependencies entirely.

If you'd previously seen this and assumed V3R was broken for you, please give it another go.

Multi-page jobs

Add Layer no longer disturbs other host pages

V3R now snapshots every page's textures into memory before the rip, so all host pages survive an Add Layer cleanly. Safe for jobs of any length.

Lamination state

Page switches and file loads reset matte properly

Lamination settings, matte uniforms, and burn-back masks are now flushed cleanly on every PDF reload and page switch.

All Layers toggle

Bulk visibility toggle now syncs matte and burn-back

The toggle now correctly rebuilds the burn-back mask and re-syncs lamination uniforms in both directions, so Show All / Hide All matches what you'd expect.

Layer naming

Remapped foil layers use the canonical name

Mapping a Duplo or custom-spot layer to one of the dedicated foil colours now updates the sidebar entry to show the foil name — Gold Foil, Red Foil, etc.

Lamination presets

Save and restore matte settings completely

Saving a lamination preset now captures gloss level, matte texture strength, and matte veil intensity, and restores all three faithfully.

Previous Release v1.1 — Render the extraordinary, more reliably April 2026

A weekend of careful work landed across the V3R suite — three new finishing effects, a smarter Layer Mapping Manager, and a stack of paper-cut fixes that smooth the workflow from import to output.

What's new

3 new effects
New finishing effect

Custom-coloured Holographic Foil

Holographic foil is no longer locked to a single look. Pick any base colour you like — gold, copper, soft rose, midnight blue — and V3R applies the rainbow diffraction pattern over the top, preserving your colour while adding the spectral shimmer.

Useful when a customer's brand calls for something more refined than full-rainbow holographic. A gold holographic foil reads as luxury foil first, with the rainbow as a subtle catch-the-light moment.

How: Foil layer panel → Foil colour dropdown → Rainbow → adjust the colour picker beneath.
New finishing effect

Holographic Glitter

Spot glitter and base substrate glitter both gain a holographic mode that adds per-grain rainbow shimmer over the existing glitter colour. Each grain shifts independently as the surface tilts, so you get that authentic chaotic sparkle rather than a uniform colour wave across the whole layer.

Three new sliders — Holographic Intensity, Frequency, and Grain Variation — let you dial it from a barely-there iridescence to a full chromatic riot. Works in any glitter colour.

How: Glitter layer (or Substrate Controls → Glitter material) → enable Holographic → tune the three sliders.
New finishing effect

Rainbow Holographic Film

A full thin-film simulation for sleeking film and holographic lamination — the kind of finish where the entire surface (or a masked area) shifts through the spectrum as the substrate tilts. Two pattern modes ship with this release: a chaotic Holographic look with patches and sparkle valleys, and a Pillars of Light mode that projects parallel rainbow bands across the surface like a real diffraction grating.

Both modes support full-coverage lamination as well as ink-mask sleeking, so you can simulate film bonded only where pigmented toner sits on the page. A full presets folder is included — save, export, share, and reload your favourite combinations.

How: Click the + Add Layer button → choose Holographic Film → pick Pattern Type, Application Mode, and refine to taste.

Fixes & polish

7 improvements
Foil presets

Hot Foil Stamping now persists with presets

The Hot Foil Stamping checkbox state is now correctly saved alongside the rest of a foil preset, including across export, import, and Save-as-Default round trips. Previously the toggle appeared to stick during a session but reset on relaunch.

Foil presets

Save-as-Default now persists across restart

Each foil colour (Silver, Gold, Bronze, Red, Blue, Green, Pink, Purple, Rainbow, and Custom) now retains its own independent saved default after quitting and relaunching V3R. A subtle key-naming mismatch was preventing custom-coloured foils from restoring on cold start.

Layer mapping

Remapping added layers no longer breaks the rebuild

When using the Add Layer feature to bring in a second PDF (e.g. a separate Duplo black plate), opening the Layer Mapping Manager afterwards used to crash the scene with a missing-texture error. The manager now correctly preserves the original textures in memory so layers can be remapped freely.

Layer mapping

Cancel preserves the existing layer mapping

If you opened the Layer Mapping Manager just to peek at the current setup and clicked Cancel, an added layer (e.g. a Duplo varnish) used to revert to its source separation type. Cancel now correctly leaves everything as-is.

Layer naming

Mapped layers show their effect name in the sidebar

When you add a layer and map a black separation to Duplo, the sidebar entry now reads Duplo rather than Black. The same applies to flood layers — pick Coating, Lamination, Holographic Film, or any other effect, and the sidebar reflects your choice rather than showing a generic "Flood Layer" label.

Layer mapping

"Remember these mappings" now off by default

The persistence checkbox in the Layer Mapping Manager is now opt-in. This is friendlier for the common case where the same separation name (e.g. "Black") may legitimately mean different effects across different customer files. Tick it explicitly when you want the mapping remembered.

Image capture

PNG capture now correctly handles added layers

Capturing a still image of a file that uses the Add Layer feature now produces a faithful render of the scene — varnish, foil, and lamination layers all composite correctly in the saved PNG, matching the live preview.

Holographic film

Tasteful factory defaults for Holographic Film

The initial settings for newly-added Holographic Film layers have been retuned. Fresh layers now load with a refined, understated look out of the gate, rather than a chaotic preview that needed five sliders adjusted before it looked right.

V3R · Visualis3R Built in Yorkshire · Print-industry tooling by Khaos Technology Ltd

We use anonymous session cookies (short-term cookies that disappear when you close your browser) to help you navigate the website and make the most of the features. For more information please view our GDPR and Privacy Policy

Visualis3R® is developed by Khaos Technology Ltd — an independent software company advancing production-aware print technology — and distributed globally through selected industry partners.
© 2025–2026 Khaos Technology Ltd. Visualis3R® is a registered trademark.

We use anonymous session cookies (short-term cookies that disappear when you close your browser) to help you navigate the website and make the most of the features. For more information please view our GDPR and Privacy Policy